Exterior door trim on Cape Cod

Exterior door trim installation is the fitting and fastening of casing, brick mold, and related profiles around the outside of a door opening: removing old or damaged trim, inspecting the jamb and flashing underneath, and installing new trim stock that is plumb, sealed, and ready for paint or a factory finish.

It is the right call when trim is rotting at the base, when a door replacement left the opening unfinished, when storm damage split the casing, or when a homeowner wants a more detailed profile. On Cape Cod the flashing behind the trim decides how long it lasts: wind-driven rain arrives sideways here, salt air corrodes unprotected fasteners within a season or two, and freeze-thaw splits any end grain left unsealed through the winter.

Daniel Araujo holds a Massachusetts Construction Supervisor License (CSL), Unrestricted (#CS-123114), and Forty One Construction is a BBB Accredited Business. We carry 51 Google reviews at 5 stars.

This page covers what exterior door trim installation includes, what it costs in 2026, how trim materials compare in a coastal climate, and what proper flashing and sealing actually require on Cape Cod.

Single double-hung window with divided lights, wood casing, finished installation. Illustrative image.

Massachusetts License

CS-123114

MA CSL · Unrestricted

Home Improvement

217279

MA HIC Registration

Accreditation

BBB

Accredited Business

Google Reviews

5 Stars

51 Google Reviews

Project Planning

Free

On-Site Estimates

Before You Start · Cape Cod

How do I know if my exterior door trim needs to be replaced?

If the trim is soft, splitting, or pulling away from the jamb, replacement makes more sense than patching. Cosmetic wear is worth painting over. Rot at the base or an open joint behind the casing is not, because water is already past the trim and into the wall.

  • It is soft underfoot or at the base. Trim that gives when you press a finger into it at the sill or lower casing has rot that started from the bottom up, usually from a failed caulk joint.
  • Rust streaks on the wall. Staining bleeding down from nail locations means the fasteners are corroding. Salt air does that to anything not stainless or hot-dip galvanized.
  • Gaps between the casing and the wall. An open joint at the casing edge or brick mold face is a direct path for wind-driven rain to get behind the trim and into the sheathing.
  • Paint that will not hold. Casing that blisters and peels repeatedly, especially at the bottom, usually means moisture is moving through the wood from behind, not just a surface adhesion problem.
  • Missing or inadequate head flashing. If there is no drip cap above the door, or the flashing is not lapped behind the house wrap, water runs straight down behind the casing every time it rains sideways.
  • Casing that has pulled away from the jamb. A visible gap between the trim and the door frame means the backing has moved, rotted, or was never properly fastened to begin with.

The one you cannot see matters most. A casing that looks sound on the face can be hiding a missing or incorrectly lapped head flashing. Water that gets in above the door and behind the house wrap will rot the rough framing long before it shows at the surface. If the trim is original and has never been re-flashed, that is worth checking before painting over it again.

Door Trim Install · Cape Cod

What exterior door trim installation includes from inspection to finished opening

A door trim installation with Forty One Construction runs through seven steps, from the first look at the existing jamb and flashing to the final caulked and paint-ready opening. Every step has a purpose, and we flag anything unexpected before we proceed so you are not surprised by scope or cost.
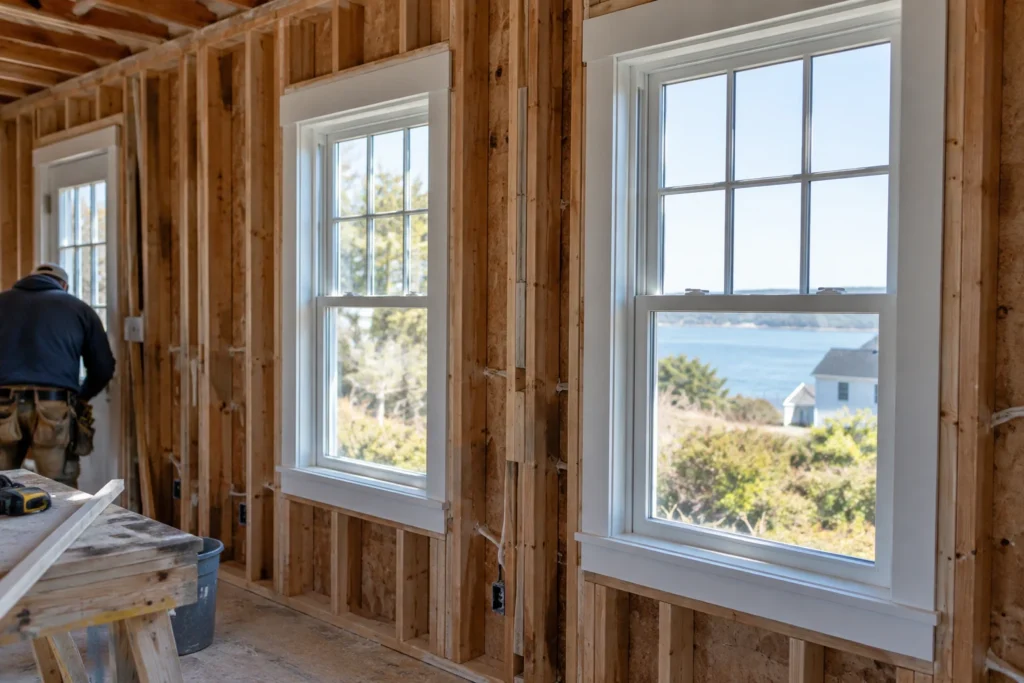
Two double-hung windows with divided lights installed in unfinished room. Illustrative image.

Assessment · Phase One

Assessing the opening before new trim goes on

01

Inspection and scope

We look at the existing jamb, sheathing, and head flashing before anything comes off. We check for rot, missing or lapped-wrong house wrap, and any sign of water intrusion behind the current casing. You get a written scope of what the job includes and anything that needs repair first.

02

Material selection

We help you choose the trim material and profile for the opening, whether that is cellular PVC, fiber-cement, primed finger-jointed pine, or solid cedar. Profile choices range from flat stock to decorative casing with a backband or a pediment above. We confirm the reveal line and overall look before ordering.

Two double-hung white grid windows, walls unfinished with patchy drywall. Illustrative image.

Installation · Phase Two

Removing the old trim and preparing the opening

03

Demo and substrate check

We remove the existing casing and inspect the jamb, sheathing, and any flashing beneath. Soft or rotted substrate gets repaired at this stage. Cape Cod's salt air and sideways rain mean we find damage here more often than in dryer inland climates, so a thorough check before the new trim goes on saves problems later.

04

Flashing

This is the step most often skipped on older capes: a proper drip cap above the door, integrated with the house wrap so the lap sheds water out rather than in. Wind-driven rain on the coast does not fall straight down. It arrives at an angle and finds every opening not properly lapped and sealed. We install or verify head flashing before any new trim is fastened.

05

Trim fitting

We cut and dry-fit each trim piece around the opening, miter or butt joints depending on the profile, and confirm the reveal line is consistent before fastening. Back-caulking goes on the contact surfaces before the trim is set, so there is no gap behind the casing for water to sit in.

Single double-hung window with divided lights, wood casing, finished installation. Illustrative image.

Finish · Phase Three

Fastening, sealing, and finishing the trim

06

Fastening and caulking

Trim is fastened with stainless or hot-dip galvanized nails driven with a finish nailer, then set and filled. All joints, seams, and end cuts get exterior-grade sealant. In salt air, the fastener choice is not a preference: galvanized nails bleed rust down cedar casing within a season or two. Stainless does not.

07

Final prep and cleanup

We fill nail holes, final-sand any rough spots, and leave the opening caulked and prime-ready. We clean the site and walk the finished trim with you. You see the work, ask questions, and we do not call it done until you agree it is.

Scope · What You Are Buying

What your door trim quote covers, and what it does not

A door trim quote from Forty One Construction covers removal and disposal of the old trim, substrate and flashing inspection with minor repair, new trim material and corrosion-resistant fasteners, caulking and sealing at all joints and end cuts, and basic site cleanup. Full door replacement, major rot repair in framing or sheathing, painting or staining beyond a prime touch-up, and permit fees for structural work are quoted separately rather than assumed into the number.

Included in the quote

  • Removal and disposal of old trim
  • Substrate and flashing inspection with minor repair
  • New trim material and corrosion-resistant fasteners
  • Head flashing installation or correction
  • Caulking and sealing at all joints and end cuts
  • Nail hole fill and basic surface prep
  • Full paint or stain coat and site restoration

Not included, quoted separately

  • Full door replacement
  • Major sheathing or framing rot repair
  • Painting or staining beyond prime touch-up
  • Permit fees for structural work if required
  • Decorative pediments or custom millwork unless specified

Done correctly means trim installed plumb and level within 1/8 inch over the opening, head flashing lapped behind the house wrap per IRC flashing requirements, all fasteners stainless or hot-dip galvanized to resist corrosion in salt air, exterior-grade sealant at every joint and end cut, back-primed or factory-sealed cut edges on wood and composite trim, gaps under 1/4 inch filled and caulked, no visible nail pops or open miters, and casing that is paint- or factory-finish-ready when we leave.

Two double-hung windows with divided lights installed in unfinished room. Illustrative image.

Trim Cost · Cape Cod

How much does exterior door trim installation cost on Cape Cod?

Exterior door trim installation on Cape Cod typically runs $8 to $18 per linear foot installed in 2026, with Forty One Construction quoting each job after an on-site look at the opening. Jobs requiring rot repair, re-flashing, or custom profile work land at the higher end of that range.

A single door opening is a short job; larger trim packages covering multiple doors are quoted as a full project.

$30–$75 Per linear foot installed
$10K–$20K Varies by material and scope

Cost Factors

What moves the price

The price moves with a handful of real drivers, including trim material, linear footage, profile complexity, substrate condition, and whether flashing repair is needed.

01

Trim material choice

PVC and fiber-cement cost more than primed pine; decorative profiles cost more than flat stock.

02

Linear footage and door count

More openings and larger door sizes mean more material, more cuts, and more labor time on site.

03

Profile complexity

A flat casing is faster to install than a built-up profile with a backband, pediment, or rosette corners.

04

Substrate and flashing condition

Rot in the jamb or sheathing, or a missing head flashing that needs to be fully re-done, adds material and time to the job.

05

Access and height

A door opening above grade or at a second-floor elevation adds staging and slows the crew.

2026 Cost Guide

Typical trim cost by scope

These ranges are a starting point for planning. Every job is quoted after an on-site look at the opening.

Job size / scope Typical range on Cape Cod (2026)
Single door, flat casing, no rot repair Lower end of $8-$18 per linear foot
Single door, decorative profile or minor substrate repair Mid-range; profile and repair add to material and labor
Multiple doors or full trim package on a home Upper end; quoted as a full project after site visit

Flashing repair and rot correction are itemized separately from the trim install on every quote.

Get a Free Estimate →

Trim Materials · Cape Cod

Wood, PVC, or fiber-cement: which trim material holds up in a coastal climate?

The right trim material depends on your budget and how much maintenance you want to do, but within a mile or two of salt water, and on Cape Cod most of us are, the fasteners and sealed end grain matter as much as the product itself. Below are the main options we install, honestly compared. Whatever the material, we use stainless or hot-dip galvanized fasteners so nothing bleeds rust down your new casing.

White cellular PVC trim board with routed edge profile. Illustrative image.

Natural Wood · Entry Tier

Primed finger-jointed pine

The lowest-cost option and widely available. It comes pre-primed and takes paint well, but it is real wood and will move with moisture if cut ends are not back-primed before installation. In a coastal climate, unsealed end grain absorbs water and splits during freeze-thaw cycles. We prime every cut before it goes on the wall.
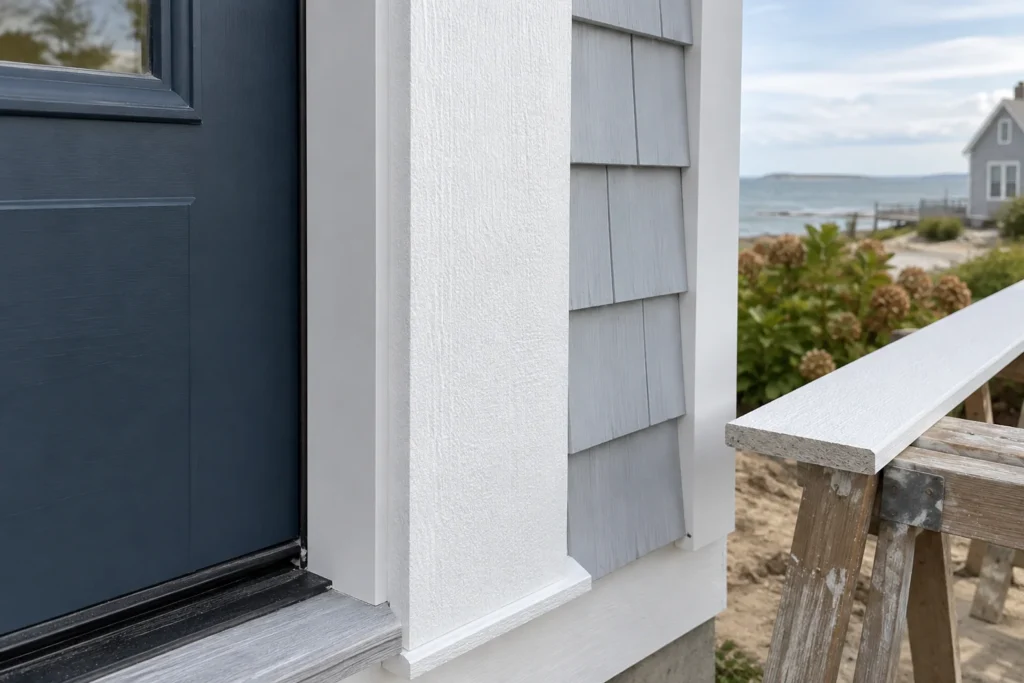
Fiber-cement trim board showing textured primed surface. Illustrative image.

Natural Wood · Coastal Classic

Cedar

Western Red or Atlantic White cedar is naturally rot-resistant and a regional standard here. It takes paint and stain well and weathers to a soft gray if left unsealed. Best for homeowners who want a real wood look. Galvanized nails will stain cedar within a season. We fasten cedar with stainless only.

Primed finger-jointed pine trim board with smooth face. Illustrative image.

PVC Trim · Coastal

Cellular PVC trim

Cellular PVC such as AZEK, Versatex, or Kleer does not absorb moisture, does not rot, and holds paint longer than wood. It is the material best suited to coastal exposure. It will not split from freeze-thaw at cut ends and shrugs off salt air. It costs more than primed pine but eliminates most of the maintenance concerns that come with wood in this climate.

Clear cedar trim board with natural grain exposed. Illustrative image.

Fiber-Cement · Durable

Fiber-cement trim

James Hardie HardieTrim is a cement and fiber composite that resists rot, moisture, and impact. It is heavier than PVC and requires back-priming at cut ends, but it holds a paint finish well and is dimensionally stable in the humidity swings that come with Cape Cod summers. A solid middle option for homeowners who want durability without paying full PVC pricing.

Polymer brick mold profile piece showing contoured shape. Illustrative image.

Composite · Low Maintenance

Composite and polymer brick mold

Pre-formed composite and polymer brick mold profiles resist rot and salt air and are ready to paint. They cost more than wood brick mold and less than full PVC casing. They are a practical choice for a standard replacement where durability matters more than a custom profile. They do not require back-priming at cuts the way wood does.

Material Comparison

Compare trim material options

Compare where each trim material fits best, how it performs in Cape Cod salt air, and the level of maintenance it requires after installation.

Option Best for Holds up to salt air Maintenance
Primed finger-jointed pine Tight budgets Fair (seal all cuts) High
Cedar Natural look Good with stainless fasteners Medium
Cellular PVC Coastal, low maintenance Excellent Very low
Fiber-cement Durability on a budget Very good Low
Composite brick mold Standard replacement Very good Very low

We name real brands when we spec a job, cellular PVC from makers like AZEK, Versatex, and Kleer, fiber-cement from James Hardie, and stainless or hot-dip galvanized fasteners throughout. If a simpler material is the right call for the opening and your budget, we will tell you that rather than spec up.

Two double-hung white grid windows, walls unfinished with patchy drywall. Illustrative image.

Project Timeline · Cape Cod

How long does exterior door trim installation take on Cape Cod?

A door trim installation with Forty One Construction takes roughly 2 to 4 hours for a single opening with no rot repair, 1 to 2 days for multiple doors or a full trim package on a home, and 2 to 3 days for jobs that require re-flashing, substrate repair, or custom profile work.

Two things stretch that window here. Jobs that uncover rot in the jamb or sheathing when the old trim comes off need repair before new trim goes on, and that work is scoped once we can see the substrate. Summer scheduling on Cape Cod is also compressed: from Memorial Day to Labor Day the calendar fills fast with seasonal homeowners who want work done before they arrive or before they leave, and we book in the order requests come in rather than promise a date we cannot hold.
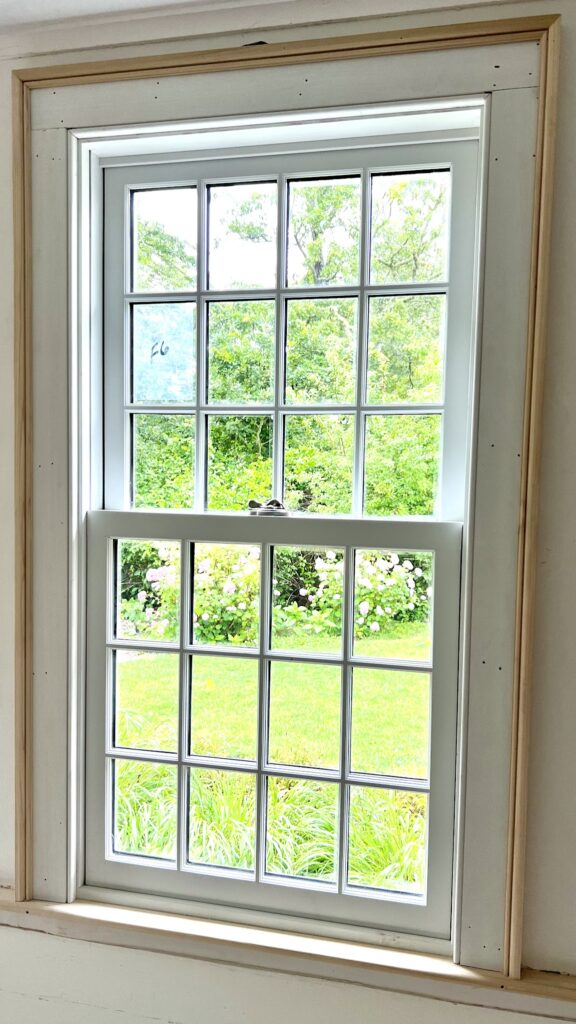
3–5 days Single door opening
1–2 weeks Multiple doors or full trim package
3–5 weeks Re-flashing or rot repair included
Single double-hung window with divided lights, wood casing, finished installation, a Forty One Construction project in Chatham, MA

Flashing and Sealing · Cape Cod

What proper flashing and sealing actually require on Cape Cod door trim

The trim is what you see. The flashing behind it is what keeps the wall dry. On Cape Cod, wind-driven rain arrives sideways off the water and gets in at the details, not the middle of the wall. A casing that looks solid from the street can be letting water run behind it at the head every time it storms. Getting the flashing right before the trim goes on is the part of this job that matters most.

Head Flashing

Drip cap and house wrap integration

A drip cap or head flashing sits above the door and sheds water out over the top of the casing rather than behind it. For it to work, it has to be lapped behind the house wrap above and over the trim below, in that order. If the lap runs the wrong way, water follows the surface down and in. We install or verify head flashing on every job and integrate it with the existing WRB before any trim is fastened. On older capes where the house wrap is missing or torn at the opening, we repair what we find before closing it back up.

Caulking and Sealing

Joint sealing and end grain treatment

Caulk at the casing-to-wall joint, the miter joints, and especially the end cuts at the sill is not finish work. It is the moisture barrier at every place where water can get behind the trim. We back-caulk contact surfaces before setting trim, then caulk all exposed joints and end cuts with exterior-grade sealant after fastening. On wood and composite trim, every cut edge gets back-primed or sealed before installation. Unsealed end grain is the most common shortcut in Cape Cod exterior trim work, and it shows up as rot at the sill within a few winters.

Service Life · Coastal Exposure

How long does exterior door trim last on Cape Cod?

The flashing and fasteners decide it more than the trim material itself. Casing installed over a properly lapped head flashing with stainless fasteners and sealed end grain outlasts casing installed without those details regardless of what the trim stock is. We do not publish a single lifespan figure because the honest answer depends on the material, the flashing condition, and how the opening is maintained afterward.

  • Salt air corrodes fasteners first. The whole service area sits within a few miles of salt water. Galvanized nails bleed rust down new cedar casing within a season or two. Stainless does not, and that single detail separates work that still looks right in year three from work that does not.
  • Freeze-thaw splits unsealed end grain. Water that gets into an open end cut or an unprimed miter freezes, expands, and splits the wood. This happens from roughly November through March and is the most common cause of early trim failure on the Cape.
  • Wind-driven rain finds open caulk joints. Rain on the coast does not fall straight down. It arrives sideways and gets in at every gap that has opened at the casing edge, the head, or the miter joint.
  • Maintenance that extends it. Inspect caulk joints every year or two, especially at the sill and head. Reapply sealant before a joint opens wide enough for water to sit in it, and repaint on schedule to keep the wood sealed against moisture.

Forty One Construction backs labor and installation with a 5-year workmanship warranty. Manufacturer warranties on trim materials are provided separately by the manufacturer and vary by product.

Local Trim Installer · Cape Cod

Where we install exterior door trim across Cape Cod and the South Shore

Forty One Construction installs exterior door trim across Cape Cod from our office in Hyannis, and the coastal conditions shape every job. Salt air corrodes the wrong fasteners within a season or two, wind-driven rain off the water gets in at every unsealed joint, and freeze-thaw splits any end grain left open through the winter. Trim work built for inland Massachusetts is not built for this.

We serve homeowners from the outer Cape through the canal: Provincetown, Truro, Wellfleet, Eastham, Orleans, Chatham, Brewster, Harwich, Dennis, and Yarmouth on one side, and Hyannis, Centerville, Osterville, Cotuit, Mashpee, Falmouth, Bourne, Sagamore, Sandwich, and Barnstable through the mid- and upper Cape, along with Plymouth. See our work in Hyannis and Barnstable.

Hyannis Home Base
Cape Cod Local Coverage
Plymouth South Shore
Single double-hung window with divided lights, wood casing, finished installation. Illustrative image.

Credentials · Accountability

What to verify before your project starts

Credentials

License and coverage you can verify

Daniel Araujo holds a Massachusetts Construction Supervisor License (CSL), Unrestricted (#CS-123114), and the company holds Home Improvement Contractor registration #217279. We carry $1,000,000/$2,000,000 general liability coverage, and a certificate of insurance is available on request. The numbers are printed so you can check them. Learn more about us.

Permits · Code

We pull the permit and build to code

We submit drawings to the Town of Barnstable Building Division and pull the permit in our name. Footings reach frost depth, ledgers get through-bolted and flashed, and every connection is built to pass framing and final inspection, not just to look finished.

Before Construction

A written scope before we order a board

You get a written scope up front, so the number in your hand is tied to specific materials and work, not a vague figure that grows halfway through. When quotes look interchangeable on paper, that's usually where the real difference sits.

Two double-hung windows with divided lights installed in unfinished room. Illustrative image.

Client Testimonials

Real clients. Their own words.

Hear directly from our clients about their experience working with Forty One Construction. Select a video to watch their story.

Forty One Construction · Client Stories Click to play · Sound on

Homeowner Reviews

What homeowners in Hyannis say

Forty One Construction holds a 5-star rating across 51 Google reviews.

5.0 ★★★★★ Google Reviews
★★★★★ Google
“From the first walkthrough to the final cleanup, their professionalism stood out. They explained every step clearly, offered smart recommendations…”
Brian Timmins Google review excerpt Google
★★★★★ Google
“We are enjoying our deck and patio and we love the fresh look our house now has.…”
Stephanie York Google review excerpt Google
★★★★★ Google
“Outstanding communication, craftsmanship, customer care and pricing. I would recommend them for any home improvement project, large or small.…”
RedBalloon Google review excerpt Google

Custom Decks · Cape Cod

Questions about exterior door trim installation

Do you require a deposit, and how are payments structured for a trim job?

Massachusetts consumer guidance advises homeowners not to pay more than one-third of the estimated cost upfront unless special-order materials are needed. We work within that standard and tie payments to a written scope that names the trim material, profile, and any repair work included. Talk specifics with us before you sign anything.

What trim materials do you install on Cape Cod door openings?

We install cellular PVC such as AZEK, Versatex, and Kleer, fiber-cement trim from James Hardie, primed finger-jointed pine, solid cedar, and composite or polymer brick mold. Fasteners are stainless or hot-dip galvanized on every job. We match the material to the exposure level of the opening and your budget, and we tell you honestly when a simpler option is the right call.

Will the trim installation disrupt the inside of my home or block the door?

Door trim work happens on the exterior of the opening, so daily use inside the home is rarely affected. The door itself stays functional during most of the job. We stage materials close to the opening and keep the work area clear at the end of each day. If access to the door needs to be limited for a short window, we will tell you in advance so you can plan around it.

What should I do to prepare before the crew arrives to install trim?

Not much. Clear any planters, mats, or furniture from directly in front of the door opening and make sure the area around the exterior is accessible. If there is an existing door screen or storm door on the opening, let us know in advance. We handle the removal of old trim, substrate check, flashing work, and cleanup. If we need anything specific from you, we will say so when we schedule the job.

What happens if I notice a problem with the trim installation after you leave?

Every install carries a 5-year workmanship warranty on labor and installation. Manufacturer warranties on trim materials are provided separately by the manufacturer. If something is not right with our work, call us, we come out and look at it at no charge, and if it is our error we fix it at no cost to you.

Why is your estimate higher than another contractor's quote for the same door opening?

When two quotes look the same on paper, the lower one wins by default. The gap usually sits in what you cannot see: stainless fasteners instead of galvanized, a properly lapped head flashing integrated with the house wrap, back-primed cut ends, and a written scope. We are a licensed local company that stands behind the work with a 5-year warranty on labor and installation.

Does exterior door trim replacement in Hyannis require a permit?

Standard trim replacement on an existing opening generally does not require a permit. Work that involves structural repair to the rough framing or changes to the door opening size may require one under 780 CMR, the Massachusetts State Building Code. We evaluate the scope at the site visit and tell you before the job starts whether a permit is needed and who pulls it.

What time of year is best for exterior door trim work on Cape Cod?

Exterior trim installation runs best in dry weather above freezing, so the shoulder seasons, April through June and September through October, are the most practical windows. Caulk and sealant need dry conditions and temperatures above the product minimum to cure correctly. Summer books fast with seasonal homeowners, so if you want work done before the busy stretch, scheduling early in the spring is the better move.

Free On-Site Estimate

Get a Quote

Ready to talk through your project? Forty One Construction will come out, look at your yard, and give you a written scope tied to real materials and a real number. Every install carries a 5-year workmanship warranty on labor and installation, with manufacturer warranties on materials provided separately by the manufacturer.

Our crew builds across Hyannis and Cape Cod, and our office is at 76 W Main St Unit 306, Hyannis, MA 02601. Call us or request an estimate and we'll get you on the calendar honestly, weather and permits accounted for.

Free Estimate
Owner-Led Service
Serving Cape Cod

No-pressure consultation · Clear upfront pricing